Monday, November 25, 2013

Camera Shots & Angles


  • Extreme Long Shot- Shot that shows entire object or human figure.
  • Long Shot- includes an amount of picture within the frame which roughly corresponds to the audience's view of area.

  • Full Shot-type of long shot which includes human body in full, with the head near the top of the frame and feet near the bottom
.
  • Mid Shot- shot of a figure generally includes the body from the knees or waist up
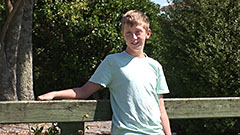

  • Close up- detailed view of a person or object, without much context provided.
  • Extreme close up- shot of a actor's eyes or mouth


  • Birds eye- shot in which camera photographs from over head

  • High angle- shot in which the subject is photographed from above.


  • Low angle- Shot where subject is photographed from below


  • Eye level- camera is 5 to 6 fro the ground corresponding to the hight of a observer.

3 Favorite Shots-
-Low angle: it's almost like you can capture the whole atmosphere and beauty of the area
-close up: I think close ups on eyes are really cool because every eye is different
-Mid shot: You can get enough with this shot to probably get the idea of something.

Wednesday, November 6, 2013

Thursday, April 25, 2013

Tape and Curl


 For this assignment, I did 2 tutorials for Tape and Curl effects. On the Tape tutorial, I made a small rectangle and added color and textures to it. Then, I took the eraser tool and carefully smooth and made the tape more transparent. Also, I took different brushes and made the sides look more jagged. Then, I placed them where I wanted on my photo and added a drop shadow to the tape and picture. Next, on the curl tutorial, I took another photo of myself and grabbed the rectangle marquee tool to make a selection. Then, I used the gradient tool with black and white and filled in the selection with that. Next, I deselected the rectangle and used the warp tool. There, I carefully grabbed the bottom left corner and moved it towards the center but not too much since I can't show any part of the original photo in the curl area. Finally, I added a drop shadow to the picture.

Wednesday, April 24, 2013

Perfume Ad

 For this assignment I made a Perfume Ad for the made up brand "Spirit Perfume/Cologne". First, I selected a picture of myself from homecoming because when I think of the brand and its slogan, I think of someone going out and doing what they want to do (which makes their inner self show). Therefore, I made a vignette version of the picture and added the slogan with bevel and emboss adjustments. Next, I found a perfume bottle that has a tree on it and it sort of went with the theme I was thinking of. I used the eraser tool and carefully cut it out of the original picture. After that, I made another text which using the brand name. Also, I made a drop shadow and bevel/emboss adjustment. I wasn't really sure what to do after that and I know if I had more time to think about it, the assignment would have turned out better.

Thursday, April 18, 2013

Glamour Shots


High Pass                         Focused Zoom


                                   Sepia Tone                       Vignette                  


Color

 For this assignment, I had to take my makeover photo and use different techniques on it for other effects. The first one was the High Pass which I had to duplicate my photo and use the high pass filter on it for a more sharper or grainier look. Then I did the Focused Zoom technique that involved me duplicating the pic once more and using the Gaussian Blur. Also, I brighten the picture using the brightness/contrast adjustment. Then, using a little of the opacity, I added a mask and used the brush tool to bring back my face into focus.
Next, I used the Sepia Tone where I desaturated the photo and used the varations adjustment. In there, I moved the Fine/Coarse slider down some and clicked the red and yellow. Then, the next effect was the Vignette where I took the Burn tool and set it to midtones. After that, I moved it around the edges of the picture to darken it. For a more darker effect, I also used the eliptical marquee tool and selected my face while inversing the picture. Then, I added a brightness/contrast adjustment for the final effect. Finally, I did the Color effect for my photo. First, I desaturated the photo and used the history brush to bring color back to myself but not the background.


Friday, April 12, 2013

My Makeover


 So for my makeover, I first decided that I wanted to smooth my skin. Therefore, I duplicated the photo and made a mask and used a noise filter. Then, I changed my eye color by making a new layer and used 2 hazel iris sized circles on my eyes and changed the layer to a hue blend. After that, I made another new layer and used the quick selection tool to select the whites of my eyes then made a hue/saturation adjustment to whiten them. Next, I added highlights to my eyes by going over with a white brush on the parts that I wanted to brighten and changed the layer mode to hue. Then, using the same hue technique, I colored over my eye makeup to refresh it a little. Also, I did a similar thing with my lips to make them a little more pink. Finally, I used a blue brush to go over parts of my hair to give highlights to it. I also had used the hue blend mode for this layer too.

Thursday, April 11, 2013

Makeovers

Hair Color

Nose Job


Skin Tone


Teeth Whitening


Wrinkle Removal


Eye Makeup

 In this assignment, I had to do multiple makeover tutorials. The first one at the top, Changing Hair Color, involved me making a quick mask on the picture and selecting parts of the girl's hair to use a hue/saturation adjustment for the color purple. On the next one, Modifying Nose, I used the picture of the girl and made a selection around her nose. Then, I went into the liquefy mode and  used the pucker tool to remove the bulge in her nose. Next I did the Skin Tone tutorial and selected the highlights of the girls face. Then, I used the eyedropper tool and selected some normal skin and made a new layer to fill that color in the selection. After that, I changed the layer mode to color and lowered the opacity to blend it in more. The next tutorial was the Whitening Teeth, where I used the dodge tool to whiten the lady's teeth in the picture. I couldn't use too much since otherwise it would've looked fake and overpowering. After that for the Wrinkle Removal tutorial, I took the lady's picture and used the healing tool to make her look younger. Finally the last tutorial was the Eye Makeup one. For this assignment, I was to use a picture of a girl's eye and use the brushes to apply realistic looking fake makeup. I also had to tone down the opacity so it wasn't overpowering. On the purple part, I used the eraser tool to add some sort of gradient effect. Not to mention applying a touch of the burn tool to bring out the colors. Overall, it was pretty easy for me and would only apply minor touch ups if I had the time.